- Introduction
- From Files to ISO: Make ISO from Files & Folders
- Step 1. Activate ISO Maker
- Step 2. Choose the Output Filename
- Step 3. Select File System Type
- Step 4. Add Files or Folders
- From Discs to ISO: Rip ISO from CD/DVD
- Step 1. Activate ISO Ripper
- Step 2. Choose Ripping Device
- Step 3. Select Output Folder & Check the Track Needed
Introduction
Freemore ISO Maker Burner provides an ISO Maker and ISO Ripper to create backups of your files and discs. You can create an ISO file, which is an image of the original disc or files that can later be burned to a blank disc without having to use the source disc again.
Download Freemore ISO Maker Burner to make ISO/rip ISO through the link below:
Download Freemore ISO Maker Burner
There are two ways to make ISO images, one is to create ISO images from the files and folders with ISO maker tool. Follow the easy steps here:
Step 1. Activate ISO Maker
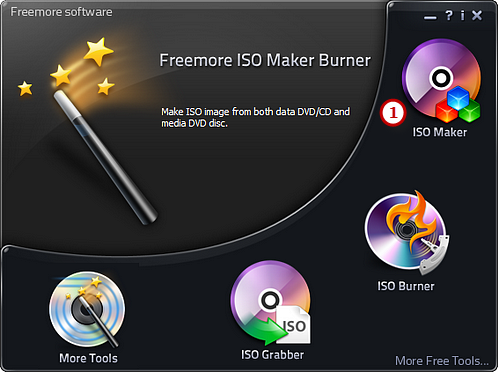
Launch Freemore ISO Maker Burner. Click "ISO Maker" (1) to run the builder wizard.
Step 2. Choose the Output Filename
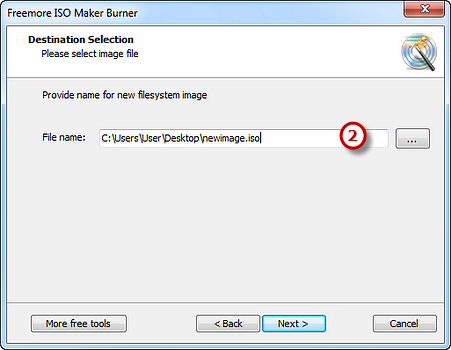
You should specify a filename (2) for the ISO image to be generated. Choose the way the data is stored on disc.
Step 3. Select File System Type
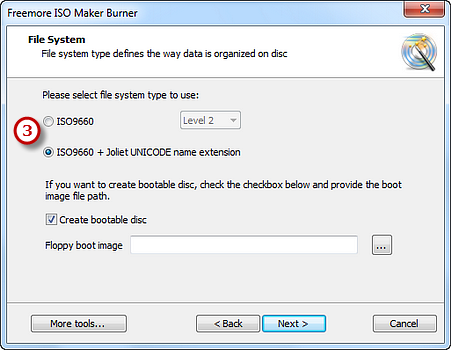
Choose a file system type (3) to store the data. You can select one from ISO-9660 and ISO-9660 + Joliet UNICODE name extension. You may check the "Create bootable disc" and click the square button to find and open the boot image files to create bootable disc.
Step 4. Add Files or Folders
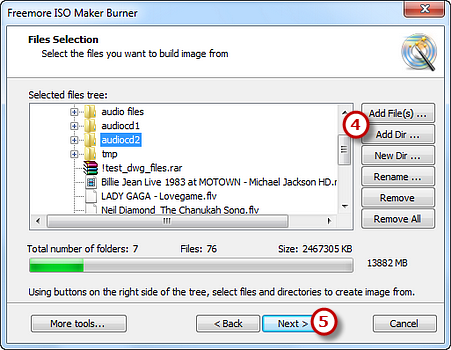
Click "Add File(s)..." & "Add Dir..." to add files & folders (4) you as needed and use "New Dir..." or "Rename Dir..." to create or rename the folder. Also, you can remove one or all files & folders by "Remove/Remove All" button. Click "Next" (5) to start creation. Please be patient now! The ISO creation will be completely finished after the process bar reaches 100%.
Another way to create ISO images is to rip ISO from CD/DVD:
Step 1. Activate ISO Ripper
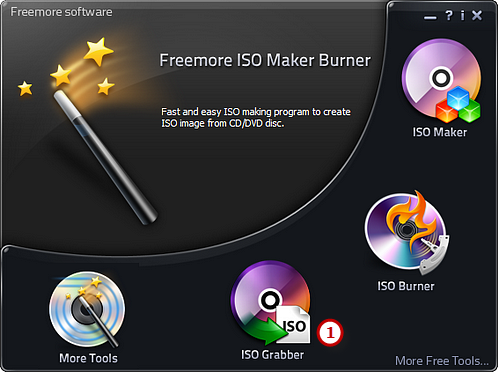
Launch Freemore ISO Maker Burner. Click "ISO Grabber" (1) to run the ISO ripper wizard.
Step 2. Choose Ripping Device
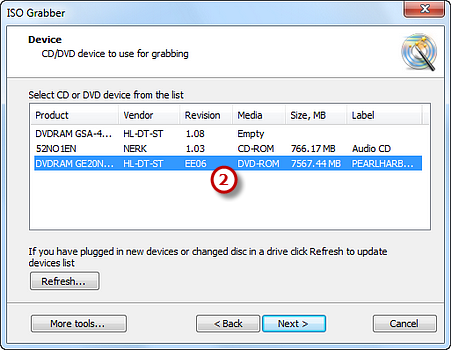
The ISO ripper scans your system for the available devices. Choose one of the usable ripping drives (2) from the list (the system will select it by default if there is only one).
Step 3. Select Output Folder & Check the Track Needed
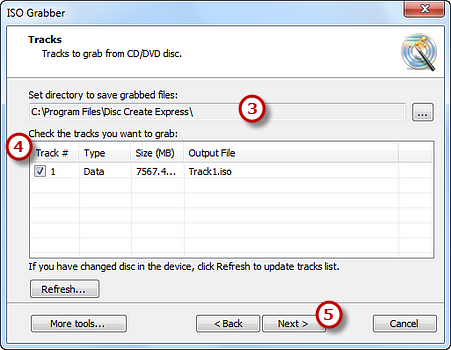
Choose an output folder (3) used for saving ripped ISO image file and check the ISO track (4) to be ripped. Click "Next" (5) to start ripping. Please be patient. The ISO ripping will be completely finished after the process bar reaches 100%. The disc will eject after the ISO image has been completely ripped.
If your question has still not been answered then please submit your query to us and we will contact you as soon as possible.
Free Studio
Freemore Audio Video Suite is a practical collection of FreeMoreSoft products that includes anumber of necessary
tools for your video/audio/
disc/image/document
creation, enhancement,
backup & sharing.
Related Tutorials:
