How to Convert YouTube Videos?
- Introduction
- Step 1. Choose Download Wizard Mode
- Step 2. Paste YouTube Video URLs & Choose Download Settings
- Step 3. Start Download
- Step 4. Input Video Files
- Step 5. Preset Output Settings
- Step 6. Start Conversion
Introduction
YouTube Videos are great for enjoyment, so you can download them from YouTube to your local computer for further appreciation. Freemore YouTube Converter is the best choice for downloading and converting YouTube videos to any other popular formats such as AVI, MP4, WMV, 3GP, FLV, etc.
Step 1. Choose Download Wizard Mode
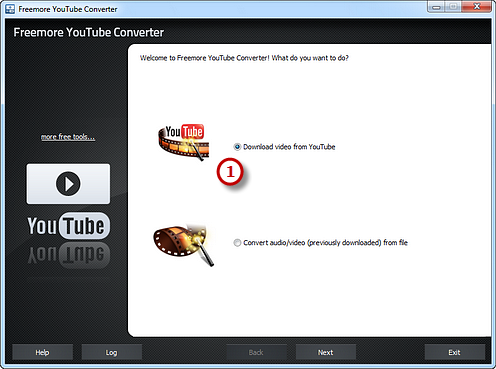
Launch Freemore YouTube Converter. Choose "Download video from YouTube" (1) mode (If you want to convert local video files, choose "Convert audio/video (previously downloaded) from file").
Step 2. Paste YouTube Video URLs & Choose Download Settings
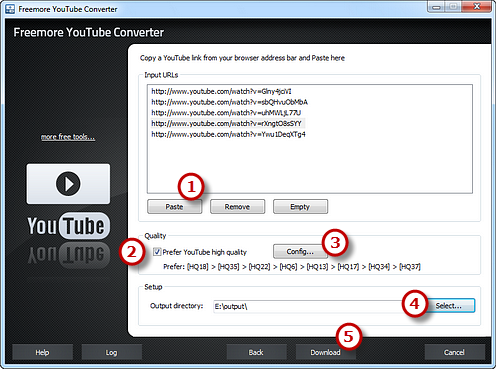
Copy the URLs of available YouTube videos and click "Paste" (1) to paste them to the "Input URLs" section. You can click "Remove" button to delete the selected URL or click "Empty" button to clear all added URLs. The program will auto-check if the URLs are correct and pop up a window if wrong URLs are pasted. You may check the "Prefer YouTube high quality" (2) and the downloader will download the video in default queue. There's a "Config..." (3) button to activate the window in which you can queue the preferred quality. Click "Select..." (4) to choose download folder. Then, click "Download" (5) to start download.
(The download priority settings here do not guarantee that you get whatever format and quality you want - 2 conditions to make it work: 1. the format/quality you want must be listed in the "Prefer YouTube high quality" window activated by "Config..." button; 2. the format/quality you want must be available on the YouTube video page. If you don't need this function, just uncheck "Prefer YouTube high quality" and the default quality would be HQ5.)
Step 3. Start Download
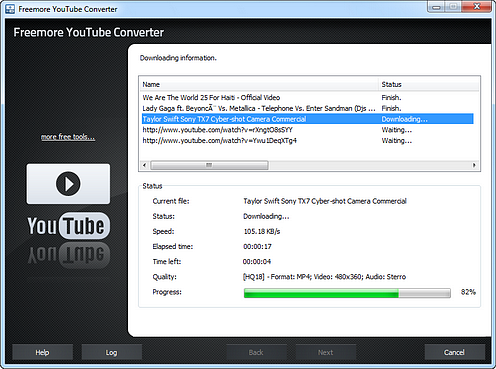
After you hit "Download" and the program will detect the URLs you paste to find the real download link. Within few seconds, the name of the video will be displayed and the download is started. You can view the file info, downloading speed, time estimation and a progress bar.
Step 4. Input Video Files
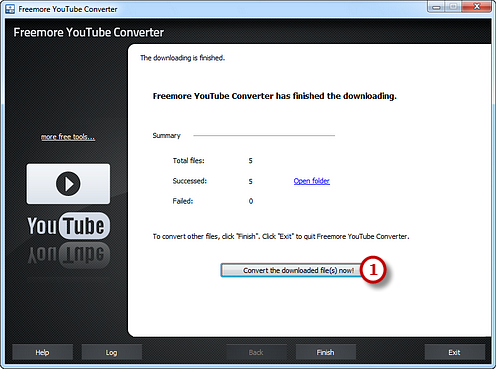
When the download is finished, you can see a brief task report and an "Open folder" button to directly open the download folder. Click the "Convert the downloaded file(s) now!" (1) for continuing conversion and the downloaded YouTube videos will be added to the conversion list.
(The filename of the downloaded video will be the same with the title text of the YouTube page the URL links to. If needed, after the downloading, you can click "Open folder" to get the downloaded file and manually rename it.)
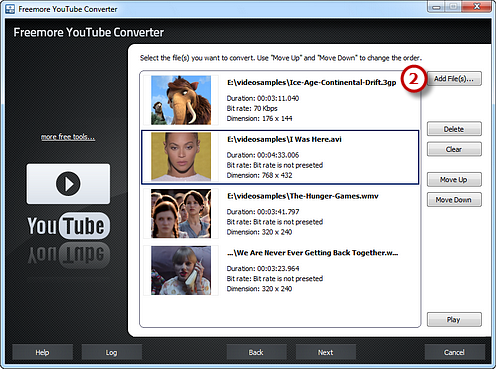
You are allowed to add more videos to the list by "Add Video..." (2) button. You can remove any or all of the imported videos with the "Delete" & "Clear" button and arrange the order of files by "Move Up" or "Move Down" button or by dragging the listed videos.
Step 5. Preset Output Settings
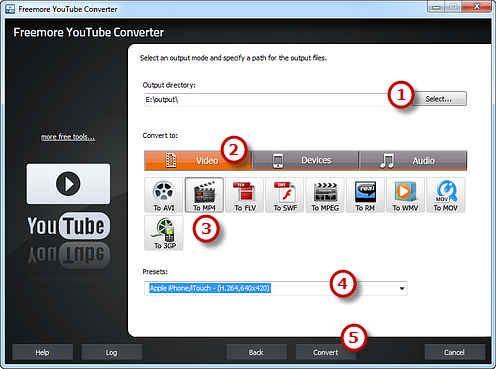
Click "Select..." (1) to choose an output folder save the output files. Click "Video" tab (2) and specify output format, for example, by "To MP4" (3) (There are three tabs "Video", "Devices" and "Audio", containing various supported formats). Moreover, you can specify output quality with many quality presets for every format in the "Presets" (3) dropdown list. Click "Convert" (4) to start conversion.
Step 6. Start Conversion
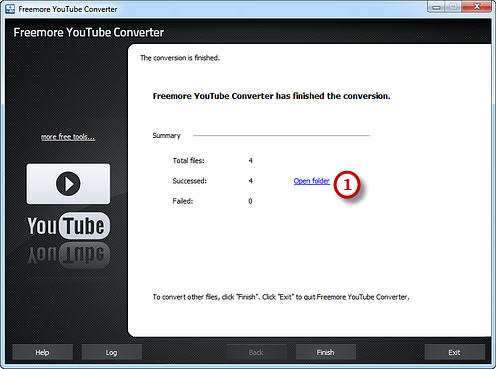
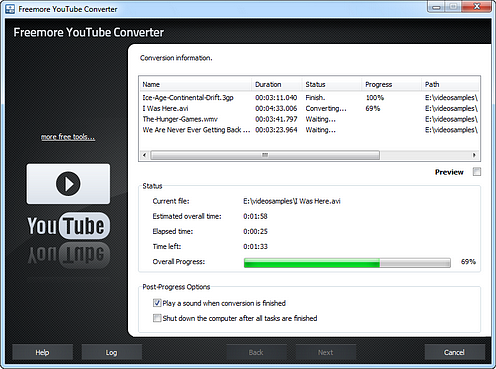
After you hit "Convert", some conversion information and a progress bar will be displayed within just few seconds. You can choose to play a sound or shut down the computer when conversion is finished.
When the conversion is finished, you can have a view of the general report about the conversion. Click "Open folder" (1) to directly find the output file.
