How to Convert Trim MP3 Music?
- Introduction
- Step 1. Add an Audio File
- Step 2. Create a Selection
- Step 3. Trim the Selection
- Step 4. Save the Changes
Introduction
Freemore MP3 Cutter is a utility that allows you to trim clips of any length from MP3 music files. You can also add fade in/out, echo and many other effects to your audio. Then these clips can be put as ringtones of your mobile phone. Freemore MP3 Cutter will never disappoint you.
Step 1. Add an Audio File
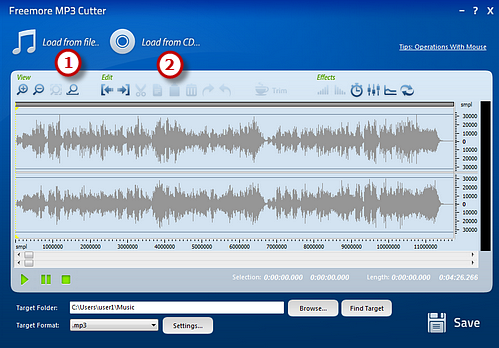
Launch Freemore MP3 Cutter. Click "Load from file" (1) and a browser window pops up. Then, select an audio file from your computer and click "Open" to input the audio file to program. If you want to input tracks from your audio CD, you should insert an audio disc into the drive and click "Load from CD" (2).The added file will be displayed in waveform which is convenient for visual editing.

Step 2. Create a Selection
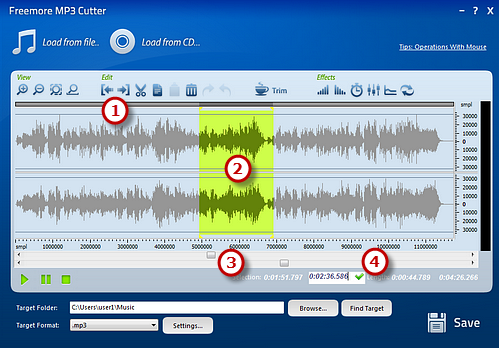
There are many ways to select a part of the audio file:Click anywhere of the waveform as a start point and use hotkey like Shift+Home, Shift+End to select from start/end (1);
Click the left button and drag along with the waveform to the place wanted to be selected (2);
Specify the beginner & end of the session by moving the sliders below the waveform window (3);
Input the start, end and length of time to choose specified region at the bottom of the ringtone maker (4).

Step 3. Trim the Selection
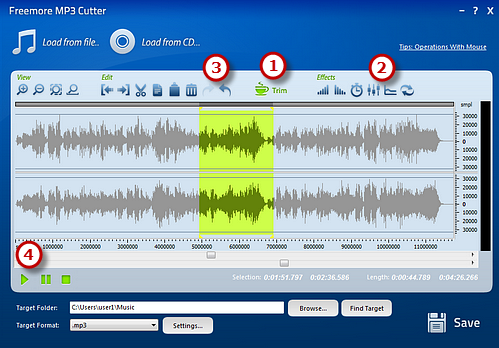
Click "Trim" (1) to remove the unselected region. Now the selected part will be zoomed. Add some audio effects (2) like echo, fade-in/fade-out to the waveform. Then, adjust the volume with an amplifier or a normalizer. You may specify the detailed effect parameters or use the presets provided. You can also mix the current file with another audio file. All the operations can be redone or undone (3). Preview (4) selected part by clicking on the play button until you are satisfied with the result.

Step 4. Save the Changes
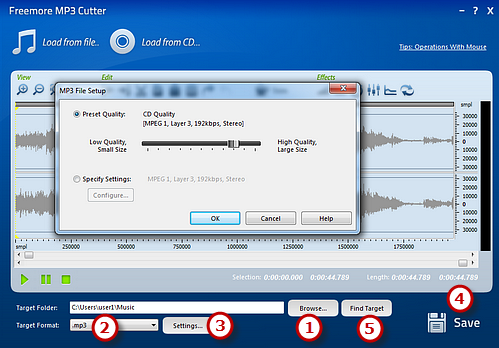
Click "Browser" (1) to choose an output folder for the cut MP3 file. Select an output format (2) from MP3, WMA, WAV and OGG in the "Target Format" drop-down list. Click "Settings" (3) to use the well-configured presets or specify the configuration parameters to adjust the output quality for every format. Then, click "Save" (4) to output the file. When the processing window disappears, click "Find Target" (5) to review the file you have cut.

