How to Burn Data CD?
- Introduction
- Step 1. Activate Data CD/DVD Burner
- Step 2. Select Usable Burning Device
- Step 3. Choose File System
- Step 4. Choose Source Video Data
- Step 5. Select Burning Mode and Burning Speed
Introduction
Blank CDs are a perfect way to store, transport and transfer sensitive files such as financial records, business deals, tax and so on. Then, you need a data CD burner tool like Freemore DVD Creator to help you burn these things to CD.
Step 1. Activate Data CD/DVD Burner
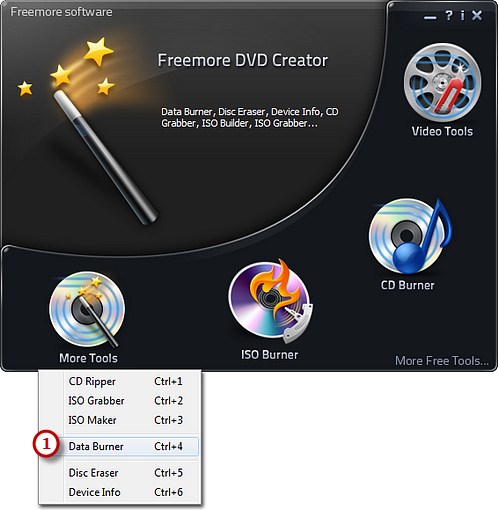
Launch Freemore DVD Creator. Insert a blank CD to the disc drive and click "More Tools - Data Burner" (1) to run the data CD/DVD burner wizard.
Step 2. Select Usable Burning Device
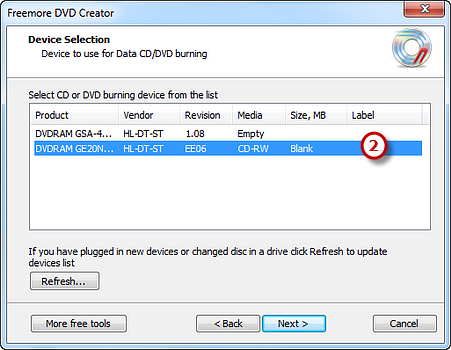
The burner automatically scans your system and all the available drives are displayed in the list. You should select one usable disc drive from the list (2). Click "Refresh" to update the device list if you plug in new devices or change the disc in the drive.
Step 3. Choose File System
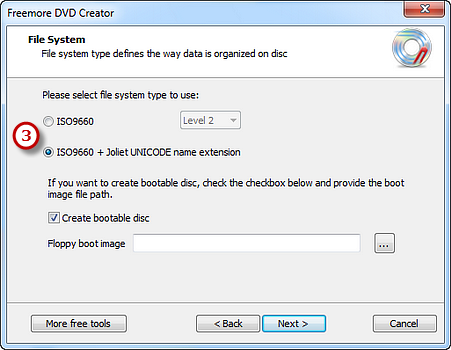
Choose a file system type (3) to store the data. You can select one from ISO-9660 and ISO-9660 + Joliet UNICODE name extension. You may check the "Create bootable disc" and click the square button to find and open the boot image files to create bootable disc.
Step 4. Add Data Files
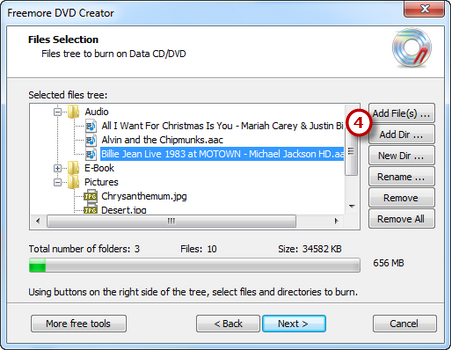
Click "Add File(s)..." & "Add Dir..." (4) to add data files & folders you want to burn and use "New Dir..." or "Rename Dir..." to create or rename the folder. Also, you can click "Remove" or "Remove All" button to remove one or all files & folders.
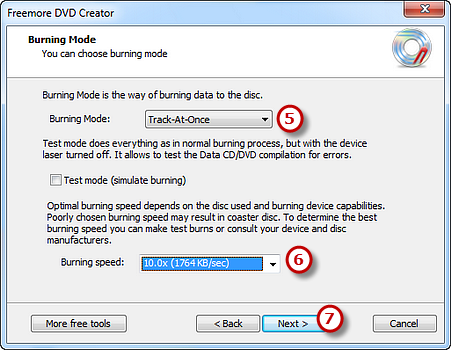
Step 5. Select Burning Mode and Burning Speed
Select one burning mode from "Burning Mode" (5) drop-down list. You may choose test mode to simulate burning for checking errors. Then, choose the appropriate burning speed (6) (Burning speed depends on the capabilities of your system and your drive). Click "Next" (7) to start burning. The disc will eject after the data CD/DVD has been completely burned.
