How to Copy DVD Movies?
- Introduction
- Step 1. Load DVD
- Step 2. Specify Ripping Settings
- Step 3. Preset Output Settings
- Step 4. Start Conversion
Introduction
Freemore DVD Copy is the most convenient DVD copy software designed for movie fans to enjoy their favorite movies. With the optimized DVD reading speed, it will be finished just after a cup of coffee to copy a DVD movie.
Step 1. Load DVD
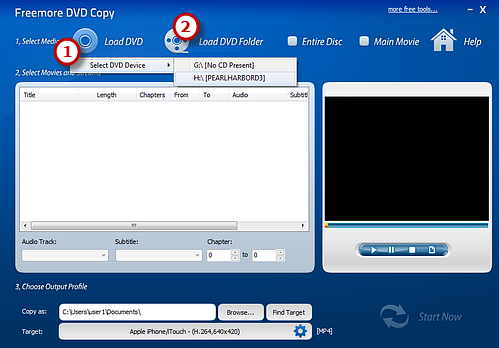
Insert a video DVD and launch Freemore DVD Copy. Click "Load DVD" (1) or "Load DVD Folder" (2) to load the video in the inserted disc.
Step 2. Specify Ripping Settings
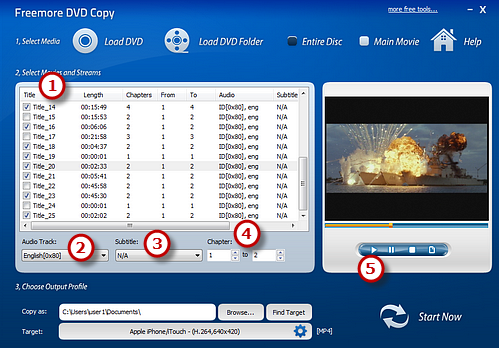
After loading, all the available titles of the DVD will be listed in the window. You can choose titles (1) from the list and select Audio Track (2) & Subtitle (3) or disable them as needed. Enter the number of the starting and ending chapters (4) to choose any chapter of the titles to copy. Click "Play" (5) button on the right to preview the video with our built-in DVD player. You can also pause or stop the video with the "Pause" and "Stop" button. Taking a snapshot of the scene being played is allowed.
Step 3. Preset Output Settings
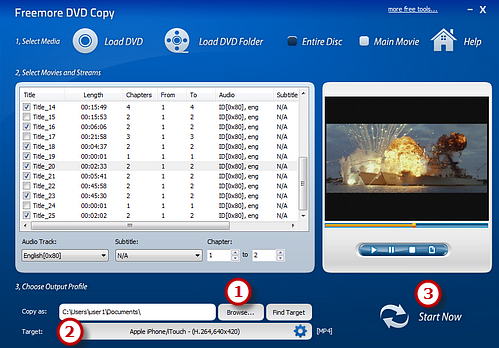
Click "Browse..." (1) to select a target folder to store the copied videos. Active "Target" (2) menu and three tabs: "Video", "Devices" & "Audio", containing various supported formats, are displayed. Click "Video" tab and choose an output format such as "To MP4". Then, you can choose the quality presets from the drop-down menu below. All the presets are well configured and have short descriptions of the usages. With all the settings done, click "Start Now" (3) to start copy.
Step 4. Start Conversion
After you hit "Start Now", some copy information and a progress bar will be displayed within just few seconds. Select the post-process options to automatically play the sound or shut down the computer after the ripping is finished.
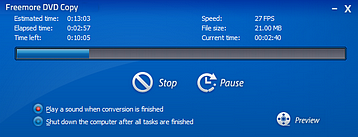
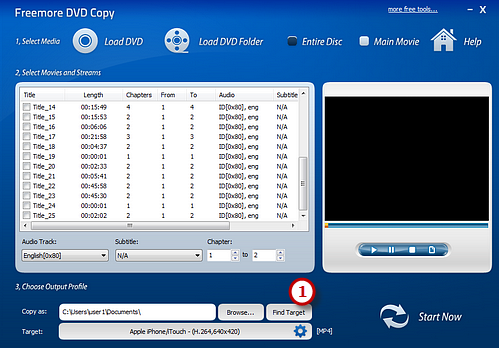
When the window disappears, the DVD video has been successfully ripped. If needed, click "Find Target" (1) to directly open the output folder to get the copied DVD video.
