How to Rip Audio CD?
- Introduction
- Step 1. Activate Audio CD Ripper
- Step 2. Select Usable Ripping Device
- Step 3. Specify Output Folder
- Step 4. Choose Compression Type
Introduction
If you want to extract digital audio tracks directly from your music CD collections and transfer them to your computer or portable audio players, Freemore CD Burner Ripper will be of great help and you can get WMA & uncompressed WAV formats.
Step 1. Activate Audio CD Ripper
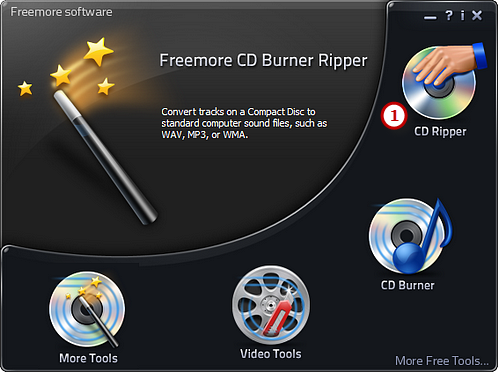
Launch Freemore CD Burner Ripper. Insert an audio CD to the CD drive and click "CD Ripper" (1) to run the audio burner wizard.

Step 2. Select Usable Burning Device
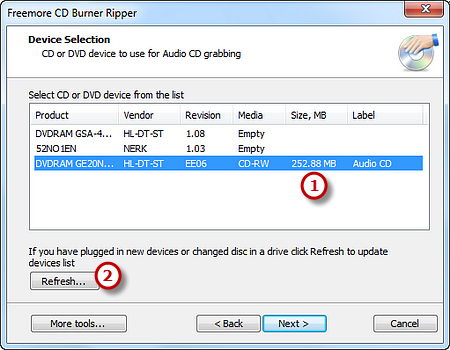
The ripper will scan your system and list the available devices. Choose one of the usable ripping drives from the list (1) (the system will select it by default if there is only one). The "Refresh" button is provided (2) to help you update the devices list in case you plug in new devices or changed disc in the drive.

Step 3. Specify Output Folder
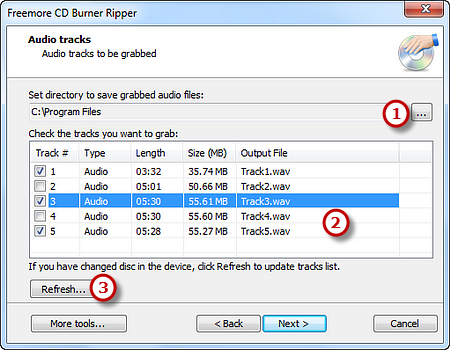
Select an output folder (1) for saving the ripped audio files. Then you can check the listed audio tracks you want to rip (2). If you have changed disc in the drive, just click "Refresh" (3) to update tracks list.

Step 4. Choose Compression Type
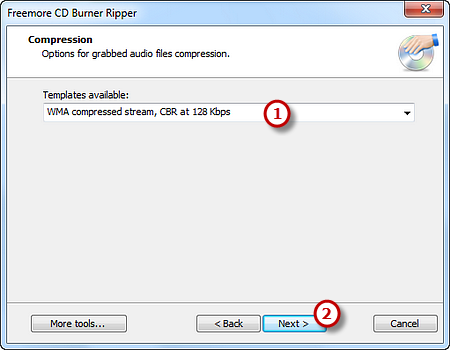
Choose one of the compression types (1) from the available templates to fulfill your needs. Click "Next" to start ripping (2) and wait until the process bar reaches 100%. The disc will eject after the audio CD has been completely ripped.

